June 26, 2026
How a Pipeline Project Comes Together, Stage by Stage
From clearing the right-of-way to final restoration, here is how a pipeline actually gets built, in the order it happens and in plain language.
Key takeaways
- A pipeline is built as a sequence of stages that move down the right-of-way in order, each with its own crew and skill set.
- The route is surveyed and cleared, then the pipe is strung, bent, welded, inspected, and coated before it ever goes in the ground.
- Every weld is inspected and the finished line is hydrostatically tested above operating pressure before anything flows.
- The last stage is restoration, putting topsoil, seed, and drainage back so the land recovers.
- Stacking the stages in the right order, with the right crews ready to hand off, is what keeps a job on schedule.
- 1 Clear & grade
- 2 String pipe
- 3 Weld & inspect
- 4 Coat joints
- 5 Lower in
- 6 Backfill
- 7 Hydrotest
- 8 Restore
Picture a developer planning a new gas line to feed a data center, or an operator replacing a tired stretch of transmission pipe that has been in the ground for decades. You know the pipe has to get from one point to another, and you know it will take crews and equipment, but the actual build can feel like a black box. What happens out there, in what order, and how does anyone keep it all on schedule?
The good news is that it is not a mystery. A pipeline is built as a sequence of stages that move down the right-of-way in order, each one with its own crew and its own skill set. Understanding that sequence makes the whole project easier to plan, easier to budget, and easier to talk about with the people doing the work. Below is the short version, start to finish, in the order it actually happens. If you want to go deeper on how crews are organized to run these stages at once, our note on what a spread is is a good companion to this one.
1. Survey and clear the right-of-way
Everything starts with the route. Surveyors stake the centerline the pipe will follow, and the right-of-way is cleared and graded so crews and heavy equipment can work safely along it. The width of that corridor is not arbitrary. It depends on the pipe size, the terrain, and how much room is needed to store excavated soil and move equipment without churning up the ground beyond the work area.
This stage is also where the quieter but critical work happens. Access roads go in so trucks can reach the line. Erosion and sediment controls are set to keep soil out of streams and ditches. Topsoil is often stripped and set aside separately from the subsoil, so it can be put back on top later during restoration. Getting this stage right sets the tone for the whole job, because a well-prepared right-of-way lets every crew behind it move faster and cleaner.
2. String and bend the pipe
With the corridor open, sections of pipe are hauled out and laid end to end along the ditch line, a step called stringing. Done well, stringing means the welders never wait on pipe and the joints line up close to where they belong. It sounds simple, but staging the right amount of pipe in the right place, without blocking the crews behind it, is its own discipline.
Where the route bends or the ground rolls, the pipe has to follow it. A bending crew uses a machine to put controlled bends in individual joints so the line lays in naturally against the contour of the trench, rather than fighting it. Forcing straight pipe into curved ground puts stress on the steel and the coating, so the bends are measured and made on site to match what the survey and the terrain call for.
3. Weld and inspect
Now the strung pipe becomes one continuous line. Welders join joint to joint, working in sequence down the right-of-way, and this is where a lot of the craft in pipeline work lives. The quality of a pipeline comes down to its welds, so the standards here are strict and the pace is set by doing it right rather than doing it fast.
Every weld is inspected, often by x-ray or ultrasonic testing, so flaws are caught before the line goes anywhere near the ground. If an inspection turns up a bad weld, it gets cut out and redone, no exceptions. There is no shortcut at this stage and no reason to want one, because a weld you skip inspecting is the one that fails later. This is one of the reasons we self-perform the work rather than hand welding off and hope the standards travel with it.
4. Coat the joints
Steel pipe corrodes, and corrosion is the slow enemy of any buried line, so the pipe arrives at the site pre-coated to protect it. The catch is that the welded joints are left bare so the welders can do their work. Once a weld passes inspection, that bare band of steel has to be protected too.
Field coating crews follow the welders and coat each joint before the line goes in the trench. The coating is applied, checked for holidays or gaps, and repaired if the inspection finds any. It is a small band of pipe at each joint, but multiply it across every weld in a long line and it adds up to the difference between a pipeline that lasts for decades and one that starts fighting corrosion early.
5. Dig, lower in, and backfill
Only now does the pipe actually go underground. A trenching crew excavates the ditch to the depth the design calls for, which accounts for cover requirements, other buried utilities, and the terrain. The trench has to be clean and shaped so the pipe rests on stable ground rather than rocks that could damage the coating.
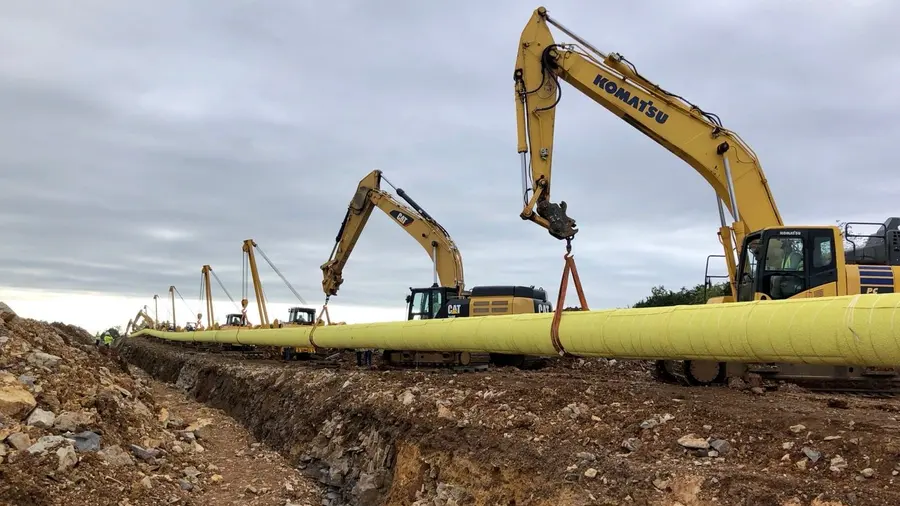
Then comes one of the more visible moments on any job. A line of sidebooms, the tracked machines that carry pipe on the right-of-way, lifts the welded string together and lowers it into the trench as one continuous piece, keeping the bends and the coating intact. Once the line is settled in, the trench is backfilled and compacted, often bringing back the subsoil first and saving the topsoil for the surface. Careful backfill protects the pipe and helps the ground settle evenly instead of leaving ruts and low spots behind.
6. Test before service
Before a single molecule of product moves through the pipe, the line has to prove it can hold pressure. That proof comes from hydrostatic testing. The line is filled with water and pressured up well above its normal operating pressure, then held and watched.
Water is used for a reason. It barely compresses, so if there is a leak or a flaw, the line simply loses pressure in a controlled way instead of releasing the stored energy that a compressed gas would. Holding the line at test pressure demonstrates that the welds, the pipe, and the joints are sound with real margin to spare. It is one of the last and most important stages, and it is a large part of why a finished pipeline can be trusted for years of service. Rushing the stages that come before it, from welding to backfill, only shows up here as a failed test and lost time, which is a strong argument for treating safety and quality as one and the same thing.
7. Restore the land
The final stage is often the one landowners care about most. Once the line is in, tested, and tied in, the right-of-way is restored. The topsoil that was set aside at the very beginning goes back on top, the ground is regraded to its original contour, and the corridor is reseeded so vegetation can return.
Drainage and erosion controls are checked and put back so water moves the way it did before. Done right, restoration means that over a season or two the land recovers and you can barely tell a pipeline runs beneath it. A narrower strip is kept clear for long-term access and maintenance, but the goal is to leave the ground close to the way we found it. Good restoration is a quiet kind of craftsmanship, and it is the stage that a landowner remembers long after the crews have moved on.
Why the sequence matters
Read straight through, the stages look like a simple checklist, but the real work is in the handoffs. Each crew depends on the one ahead of it and feeds the one behind it, so a slow bending crew backs up the welders, and welds that miss inspection stall the coating and the trenching. Stacking these stages in the right order, with the right crews ready to pick up the work at the right moment, is what keeps a job on schedule and on budget. That coordination is the heart of pipeline construction, and it is easier to hold together when one team owns the whole scope of work rather than splitting it across a chain of subcontractors.
If you have a project in mind, we would like to hear about it, even if all you have so far is a line on a map and a rough idea of where the pipe needs to go. Get in touch and tell us about it, and we can walk through the stages, the schedule, and what it will take to build it right.
Frequently asked questions
How long does it take to build a pipeline?
It depends on length, diameter, terrain, and how many crews are working. A short distribution tie-in can move quickly, while a longer cross-country line runs in overlapping stages so several crews work at once. Weather, permits, and access all affect the pace, which is why a realistic schedule is built stage by stage rather than guessed at up front.
What is a right-of-way?
The right-of-way is the cleared corridor of land where the pipeline is built and later maintained. Its width depends on the pipe size and the terrain, and it holds room for equipment, the trench, and topsoil storage during construction. After the line is in the ground, most of that width is restored, with a narrower strip kept clear for long-term access.
Why is a pipeline pressure tested with water instead of gas?
Water does not compress much, so if there is a flaw, the line simply loses pressure instead of releasing stored energy. That makes hydrostatic testing a safe, controlled way to prove the pipe holds well above its operating pressure before any product goes through it. It is one of the final checks before a line is put into service.
What happens to the land after the pipeline is finished?
The right-of-way is restored close to the way it was found. Topsoil that was set aside goes back on top, the ground is regraded and reseeded, and drainage and erosion controls are put back in place. Done well, the corridor recovers over time and you can barely tell a line runs beneath it.
Does one contractor handle all of these stages?
It varies. Some jobs are split among several subcontractors, which adds handoffs and coordination risk. We self-perform across the scope, from clearing and stringing through welding, testing, and restoration, so the same team carries accountability from the first stake to the last seed.